Monday, 18 June 2012

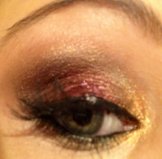
Sparkly Olive Eyes


Today i thought i would do another everyday-wearable type of eyeshadow.I LOVE this main colour that i have used,its in between a khaki and a gold.It just makes you're eyes pop without being too in-you're-face.I have actually had quite a few of these colours i have been using lately for a while but i do have a tendency to buy something new because i HAVE to have it,put it in my makeup cupboard and then it never see the light of day again because i forget about it....So i am rediscovering alot of new (or not so new lol) things,so if i use anything that i think may of been discontinued i try to let u know if i know of a dupe in that colour incase u want to get you're hands on it.Thanks for stopping by guys,it means the world to me :) I love to read all of you're comments,so please leave one and subscribe!

Products used:Napoleon Perdis China Doll gel liner in "Copper",Napoleon Perdis eyeshadow in #34 (they have re-launched this line so i think that "Chocolate Ganache"  is a good dupe),Girlee Cosmetics eye shadow in "Khaki Green" and "Bliss",NYX jumbo pencil in "Dark Brown"

-First i started by applying eye primer over my lids (i used F.Y...eye by Benefit) then around the entire eye i used the "Dark Brown" pencil and then smudged it up to my crease with my finger (doing this will make it look more blended and no harsh lines)

-Then over the top of that i used the "Khaki Green" except on the very inner corner and i only used this colour on the top lid.

-After that i used the #34 on a blending brush and i blended around the edges of the green to give it a glow-ey look.I also used this colour along my lower lash line,except in the very inner corner.

-Then i used the colour "Bliss" around the inner corner of my eye and then over lapped it with the green a little.

-I then used the "Copper" gel liner on a flat eye liner brush and pressed it down along my water line (my lower lash line) 

-I then finished off with liquid liner and mascara.


Wearable,Everyday Bronze & Gold Eyes


Hi guys i hope you are all having a fabulous start to the week! Today i thought i would do a look that's good for all you working gals out there :) This is great because its very work-appropriate,but its still a bit colourful and pretty without it looking like you need paint thinner to remove you're makeup (not cute). I hope you like this and try it out,remember you dont need these exact products,similar colours will work just as good!

Products used: BFTE eyeshadows "Hitchcock","Sunset Blvd","Heat",NYX jumbo pencil in "Black Bean".

-First i started by applying eye primer over my eye lid,i used Urban Decay's "Primer Potion".Next i used the Black Bean pencil over my entire lid,top and bottom taking the colour up to the crease of my eye,just blending it up with my finger.I LOVE using black bases under my eye shadows.It makes the eye shadows take on an entirely different colour,and seem deeper and smokey-er.It will look scary to start with but it will look amazing after applying you're eyeshadow!

-Next over almost the whole lid except the inner corner i wet my eye shadow brush,dipped it into the "Hitchcock" colour,then applied it to the outer 3/4 of the lid.

-I again wet my brush and used the "Sunset Blvd" and patted that around the inner eye area.

-Then, in between those two colours i used the colour "Heat" also on a wet brush.

-Lastly i lined my lashline with liquid liner and applied mascara to my lashes.


Thanks for stopping by! I would love to hear all of your comments and please subscribe :)
Tiarni 
XOXO


Thursday, 14 June 2012

Frankie Sandford Inspired Look!


Today i decided to do something different,a celebrity inspired look and who better than Frankie Sandford! I love this girl,she has amazing style and i always enjoy seeing different pictures of her because she is a beauty chameleon! She doesnt just stick to one look and i love that.One day you will see her sporting a nude lip and smokey eye and the next she will have opted for the glam look with a simple winged liner and red lip! This look is actually really simple you just need a good black eye liner!

Products used: Urban Decay Naked Palette,Urban Decay Deluxe eyeshadow in "Ruthless",Urban Decay eye pencil in"Perversion",NYX jumbo pencil in "Dark Brown" ,NYX  lipstick in "Iris",Napoleon Perdis lip lacquer in "Ambrosia Gold"

-For the face i did my regular foundation routine,Frankie is a bit darker than me so i just used my regular products,she has mainly used bronzer on her cheeks and a tiny bit of a peachy blush so i used the "NYX Matte Bronzer" and "Nars Orgasm" for the blush.

-For the eyes i started by applying primer over my entire lid (i used Urban Decays "Primer Potion",then over the the top of that around my entire eye lid i used the "Dark Brown" pencil then blending it up to the crease with my finger.

-After that i applied the colour "Darkhorse" ( a frosted dark Brown) from the palette all over my lids on the top and bottom.

-Then i used "Ruthless" around the inner corner of my eye,taking the colour up quite high.

-I then blended the outer edges out with the colour "Smog" (A medium Bronze) taking the colour out in a wing shape.

-Around her eyes are very black so i used the "Perversion" eye pencil (The blackest black eye pencil) around my whole eye top and bottom.I then went over that line with my smudge brush so the wasnt a neat line,This gives it more of a smokey look.

-I then applied mascara and false lashes.

-Lastly i used the "iris" lipstick (a Peachy golden colour) and over the top of that i used the "Ambrosia Gold" lip lacquer.
And.....TA DAH! The finished result!


Thanks for stopping by i appreciate it so much if you like this please subscribe!!!
Tiarni :)
XOXO


Wednesday, 13 June 2012

Magical Sparkly Eyes!


Hi guys i hope you are all having a fabulous week! I found these photos of a look i did a fair while ago i was going through the 5000 pics i have of my daughter in my phone,they must have gotten lost in the sea of indie lol. I did this before i was even blogging but i loved it so much i took some pictures :) This is so easy to do and only using 3 products! You will notice in the pictures depending on the lighting i am in the colour of the shadow changes its so pretty!I hope you guys enjoy this and try it out,the main colour (the sparkly one) im almost certain it got discontinued but i did some looking around and found there is an exact dupe made by "Sugarpill" called "Dragon Scales". Thanks for dropping by!

Products used: "Fig.1" by MAC, #38 loose dust by Napoleon Perdis,NYX Jumbo pencil in "Dark Brown"
(Not Pictured Urban Decay eye pencil in "Perversion" around entire lash line,Benefit "Bad Gal" Mascara)

-First i started by applying primer over my entire lid,then over the top of that on the top and bottom lids i used the "Dark Brown" pencil smudging it out on the edges taking the colour up to the crease of the eye.

-Next,over the whole lot of that dark brown i used the #38 colour covering the entire eye,top and bottom.

-Then all around of the edges of the colour on the top lid i used on a blending brush "Fig.1" to give it a shadowy-purple look.

-Then i lined completely around my lash line with the "Perversion" pencil then smudged the edges out with a smudge brush.

-Lastly i applied mascara and if you like,false lashes!


Forest Green Eyes


I thought i would do a post on how you can accentuate your eye colour and trust me this is so easy to do! To accentuate your eye colour you can either go the exact opposite to the colour of you're eye eg: if you have blue eyes peaches/coppers/oranges will make them stand out like crazy same as if you use blue eye shadow with blue eyes the same rule applies. My eyes are a funny grey colour with a tiny bit of green,and you can see how green they look using green eye shadow (they would also stand out alot more with purples) so something for you to try out tomorrow! Have a play around too and see what tones/colours suit you're eyes it is amazing the difference it can make :)

From top to bottom:MAC Eyeshadows "Cool Heat","Juxt","Bio Green","Humid","Plumage" NYX Jumbo pencil in "Sparkle Green"

-To start off with i applied eye primer over my entire eye lid(Urban Decay "Primer Potion"),then on the outer half of my top and bottom lids i used the "Sparkle Green" pencil,then i smudged it out with my finger taking it to the crease.

-Next on the top eye lid in the outer corner i used "Plumage" (a very deep matte green) and winged it out a little bit and the blended around the edges taking it up just above the crease.

-Then on the bottom outer two-thirds of the lash line i used "Cool Heat"(A shimmery teal-blue) on a smudge brush so i get a soft-smudgey line.

-Next in the center of the eye lid i used "Humid" (a sparkly moss green) slightly overlapping the "Plumage"to blend the colours together.

-Then i used "Bio Green" (Shimmery lime green) next to the "Humid" again over lapping the edge of the colour to help it blend. i stopped just before around the tear duct.

-After that i used "Juxt" (a very light sparkly green) all around the tear duct and blended it into the colours  on either side of it. I also used the "Juxt" on a blending brush and went all around the edge of the colours the create a fading out effect.

-Lastly to finish i lined my water line again using the "Sparkle Green" and my top lash line using liquid liner (L'Oreal Carbon Black Lineur Intense) and mascara (Benefit Bad Gal)


Tuesday, 12 June 2012

Metal Eyes


I am one of those insane people who love Autumn and i really even prefer winter to summer...i know Crazy! Dont get me wrong i would rather not freeze my butt off but i just love everything about those months! So yep,you guessed it ANOTHER Autumn inspired eye look lol i love these types of warm colours and they look amazing on everyone :) I will be using today the "Loose Pearl Eyeshadows" today by NYX these are so pretty and have so much colour to them! Again very affordable i believe i bought the full set (30 eye shadows) for about $40 from "Joys Cosmetics" .Thankyou so much for stopping by and i hope this is helpful to you!

Products used: NYX Jumbo eye pencil in "Dark Brown" (There are swatches and info on these in my "why i love NYX jumbo pencils" post)  Loose Pearl Eyeshadows in "Walnut","Rust","Oro"

-First i applied primer over my entire lid,then over the top of that also over the entire lid,top and bottom i applied the "Dark Brown" pencil and smudged it out with my finger taking it up just above the crease.Doing this will provide a rick and warm base for the eye shadows to go on to.

-Next i used a pencil brush with the colou "Walnut" and did a slight wing in the outer corners of my eyes also making a line around the crease/socket of my eye,dont worry if its not perfect because you will then blend all around the Walnut colour to soften the edges.You can also use this colour along you're lower lash line stopping just before the inner corner.

-After that i used the colour "Oro" (this is a rich beautiful gold its so pretty) all around the inner corner of my eye.

-Then i wet an eye shadow brush and dipped it into the colour "Rust" and pressed it into the centre of the eye lid and repeated dabbing it on a couple of times.This is called "Foiling".

-Then just using the same brush with the colour "Walnut" on it i dabbed around the edges of colour either side of the rust this wil just blend the colours better.

-Then i just finished off with liquid liner,mascara and if you like false lashes!


Thanks everyone so much for you're support if you like this blog please subscribe by clicking the "Join this site" button.
Tiarni 
XOXO


My Day-to-Day Makeup Routine & What I Use


Today i thought i would share with you guys what makeup products i use every day and how i apply what.
I always like reading these to see what other people do,because everyone does things differently and its always useful to pick up some tips! Please keep in mind im not saying you have to use these products or do these steps its just what i do and what works for me :) i hope you pick something up from this and thanyou for reading!

Step 1. 
I start off by using the Napoleon Perdis "Skin Renewal Serum".I really like this because i feel like when i put my foundation over the top of this it blends so well and goes on so smooth. Starting off with anything moisture based is good,this will make you're makeup last longer (especially if you have dry skin) ,and go on more smoother and more even. You could even use moisturizer if you like,essentially the only difference in that and face primer is the silicone which helps to level uneven skin texture.  


Step 2.
In one of my first posts i said i would always use the Napoleon foundation stick but i have been using the NYX HD Studio Foundation and i love this! What i like most about this is it is so easy to control the coverage which i like to do depending on my day and it is so affordable! I did find to start with that i would have to retouch it after a few hours but when i changed powders it made the biggest difference as i was only using a very light powder before. When applying this i use a foundation brush and start dabbing the foundation into the centre of the face (This is where you're skin needs the most coverage) and then blending the makeup outwards towards you're hairline and jaw.To finish off i use a damp beauty blender to press the foundation into the "T" section of my face,this makes the makeup appear more even and a more natural look. If you do decide to use a sponge make sure it is damp so it doesnt soak up all of your foundation and wash it after every use because they do harbor bacteria.

Step 3.
I use the Napoleon Perdis Concealer Palette for all of my concealing,the best thing to remember when concealing is when you want to cover a scar,deep circles under you're eyes,or anything that is under the skins surface,you should use a concealer that is one-two shades lighter than your foundation as this will highlight and raise indentations. When you want to conceal a blemish,mole or any raised imperfections (anything thats above the skins surface) you should choose a concealer that is the exact shade or even a half shade darker than you're foundation so it will flatten and minimise . So all you girls out there that love your concealer and are using a lightr one on a raised pimple you are actually drawing attention to it!


Step 4.
This is the MAC "Prep & Prime" finishing powder,i usually use this on a fluffy brush and dust this over the area's i have used concealer on and this sets it in place.I love this its translucent so there is no colour to it,this is also a great product to dust around the eye area if you are having trouble with blending you're eye shadow.


Step 5.
I use this as my face powder it is amazing! Its the "Twin Cake Powder" by NYX,i love this stuff and you only need a tiny bit. I just use this on a kabuki brush over my "T" section,i find when i wear this my makeup lasts all day and has a flawless finish to it.


Step 6.
Bronzer,this would be one of those "if you got stuck on a desert island and could only take X amount of things...." This is the "Matte Bronzer" by NYX and whilst i am a bronzer girl you have to be so careful not to go overboard.
Bronzer should NOT be all over you're face,just the areas the sun would hit like around you're hair line,cheek bones,jaw line and temples if you like. I also like to choose matte bronzers rather than glittery or shimmery ones as they look  more natural,the sparkly ones can look "muddy".

Step 7.
This is a NYX blush in "Peach",this is so pretty it just gives a slight peachy glow to the cheeks.When using blush smile and apply to the apples of you're cheeks,smiling will help you find you're cheek bones and make you're face look more lifted and do wonders for you're bone structure as opposed to when you apply this without smiling so many people put blush below their cheek bones,this just isn't very flattering on the face.
If you like you can also use high lighter on the tops of you're cheek bones, center of the forehead,down the nose and center of you're chin (also if you apply a high light above you're top lip it will make them look fuller) my favorite is "Lumiere" in the Sigma "Paris" Palette.
I hope you got something out of this,and i do apologize for going a bit off track at times lol thank you for stopping by!
Tiarni
XOXO